
Nozzle adapter
Fit the adapters on the real AWG 2235 nozzle first, then insert the controllers. Do not force anything.
Setup as video: Set up the nozzle
What’s in the box
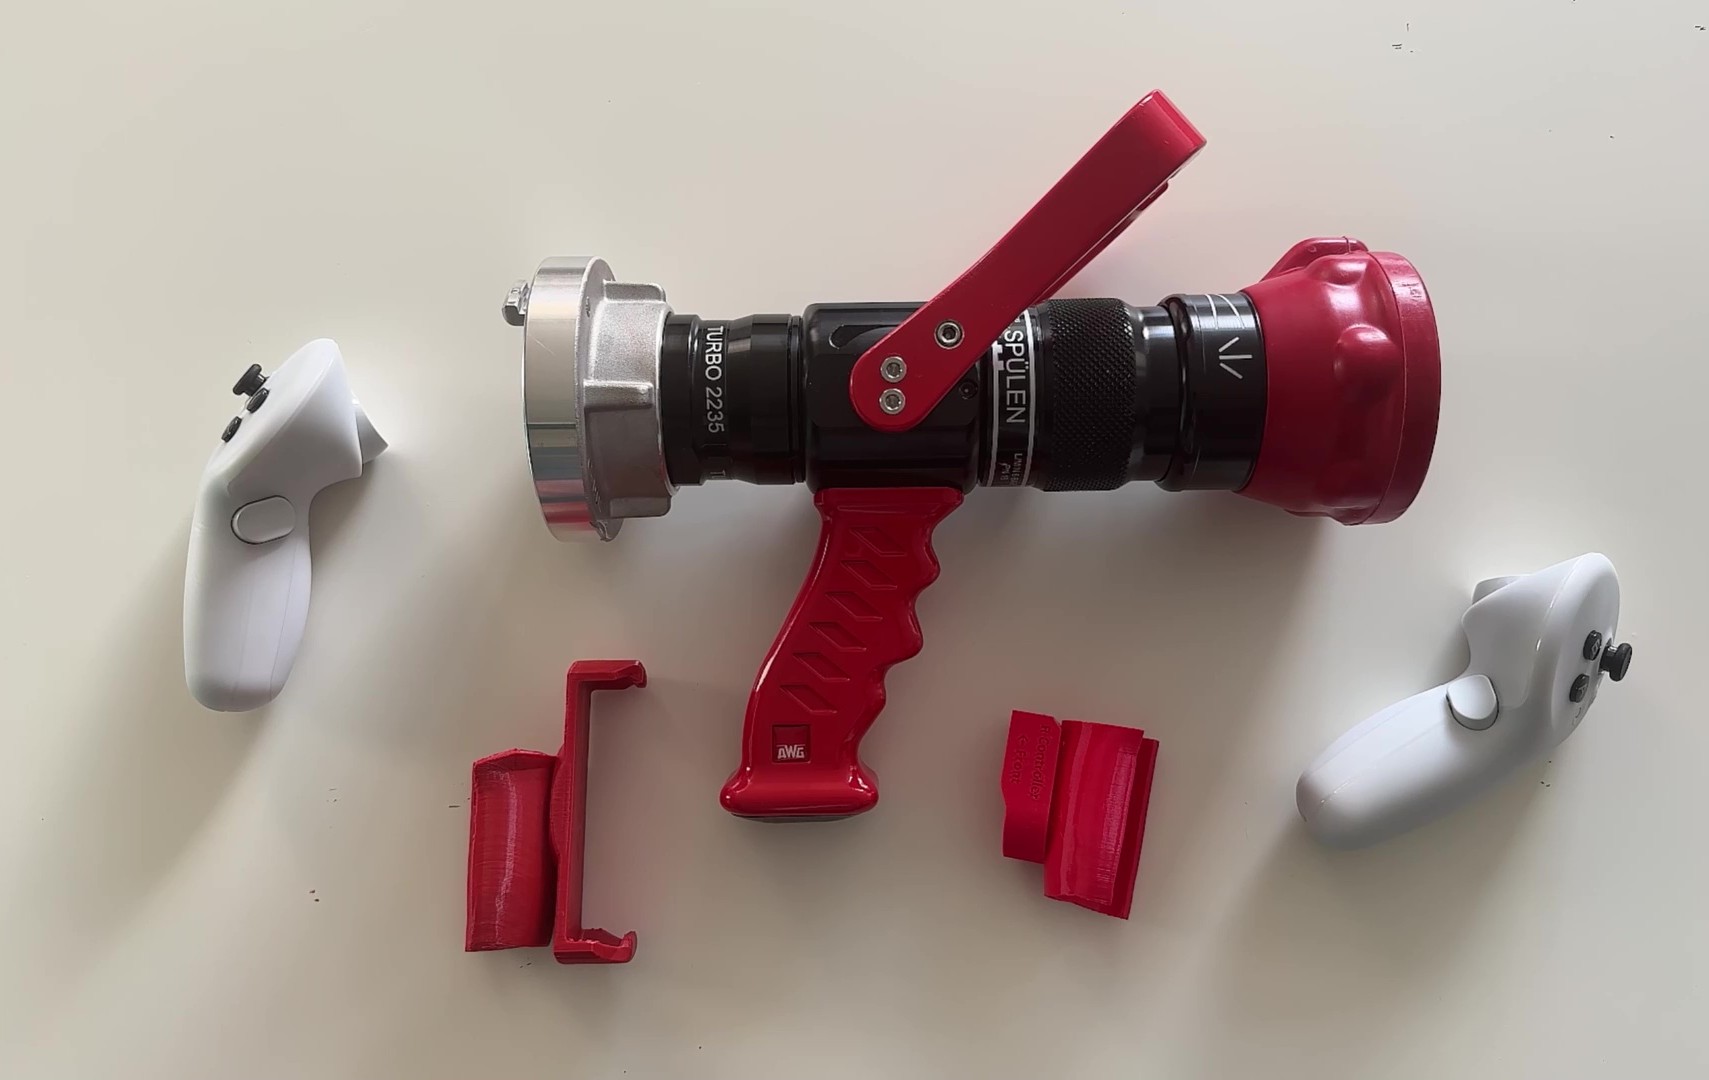
- Front adapter: later the left controller
- Side adapter: later the right controller
- rear cover or a standard C-hose coupling
Front adapter
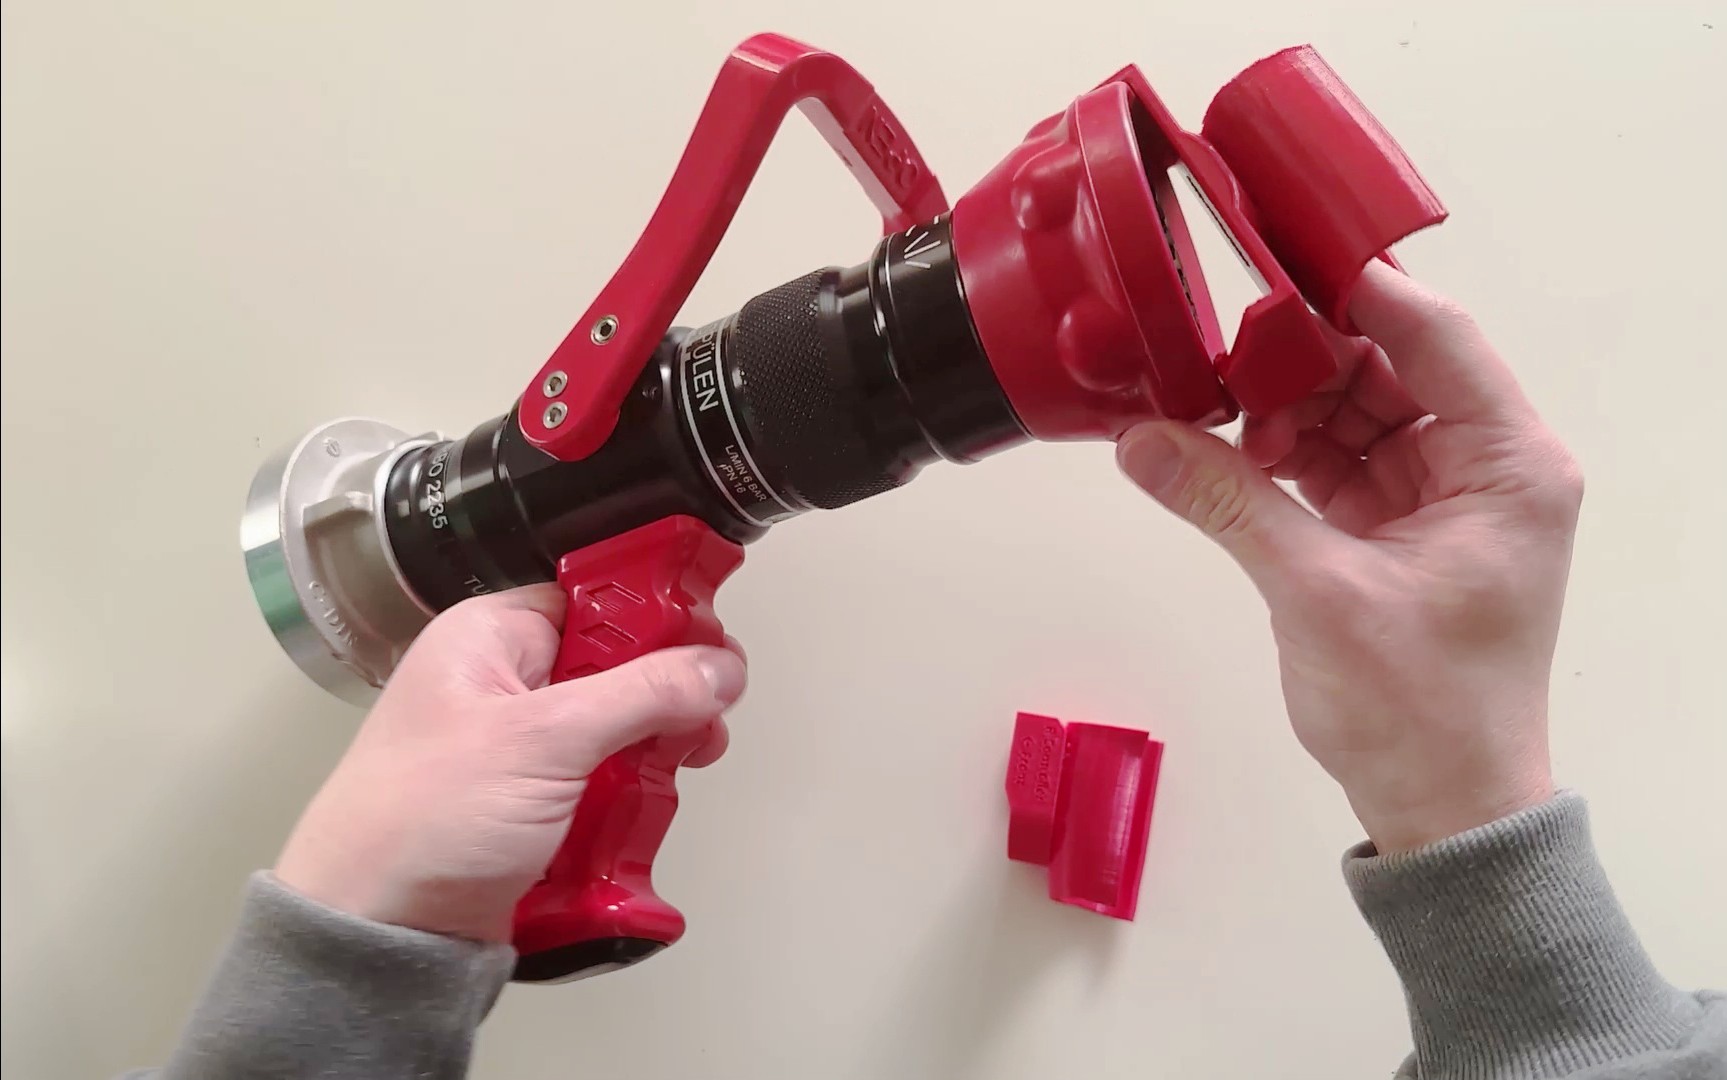
- Set the adapter notch on top of the rubber nose on the front segment.
- Stretch the adapter over the rubber ring at the bottom with a little pressure.
- Check that it sits firmly and turns with the front segment.
Side adapter
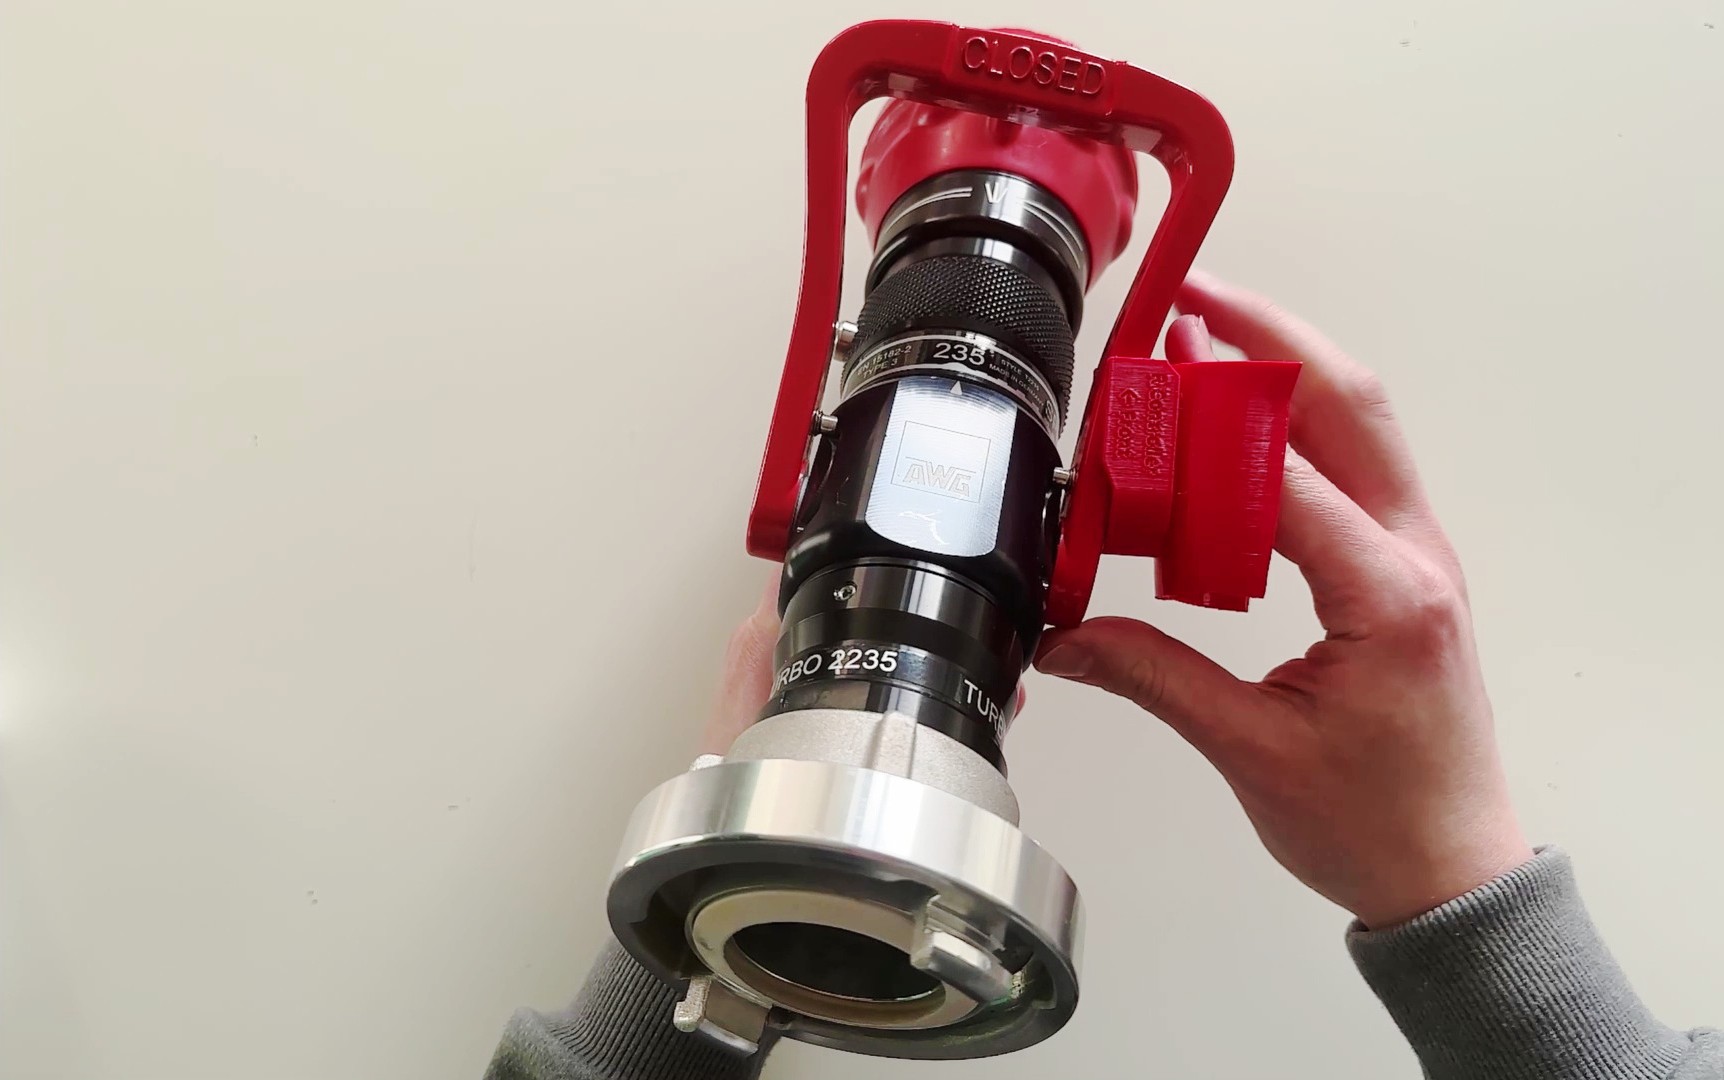
- Place the adapter so the two small lugs sit on the handle.
- Push it down until it clicks.
- No wobble – it must hold the right controller cleanly.
Insert the controllers
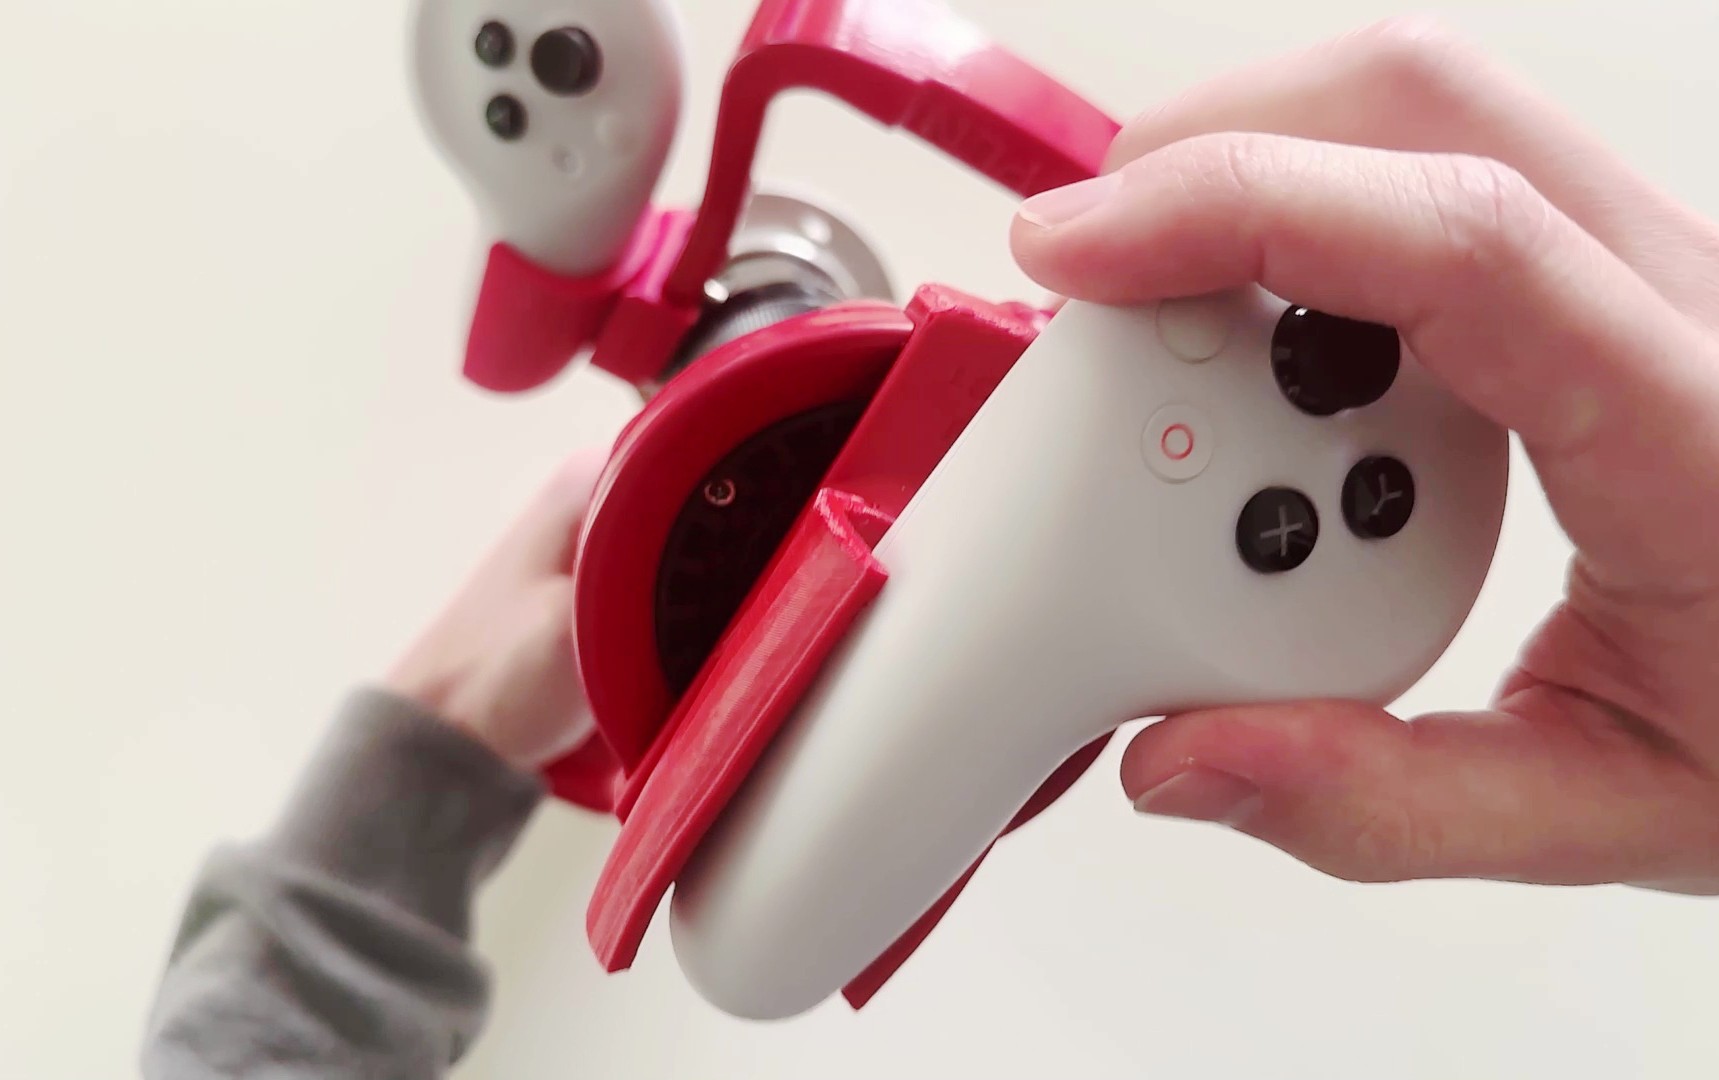
- Start with the right controller at the side adapter: insert it loosely and twist until it tightens.
- Place the left controller in the front adapter and twist it in the same way.
- Both controllers must turn with the nozzle parts.
Click and teleport
Once the controllers are in, click and teleport with the top button on the controller – with the heel of the hand or the thumb, depending on the grip. Show this, otherwise many people miss the interaction.
Check
- Controllers sit firmly, but not under tension
- Tops visible to the tracking cameras
- Briefly test open, close and stream pattern
- In the app, select the real nozzle
- If tracking is skewed, open the nozzle and turn it toward the headset until both controllers are visible